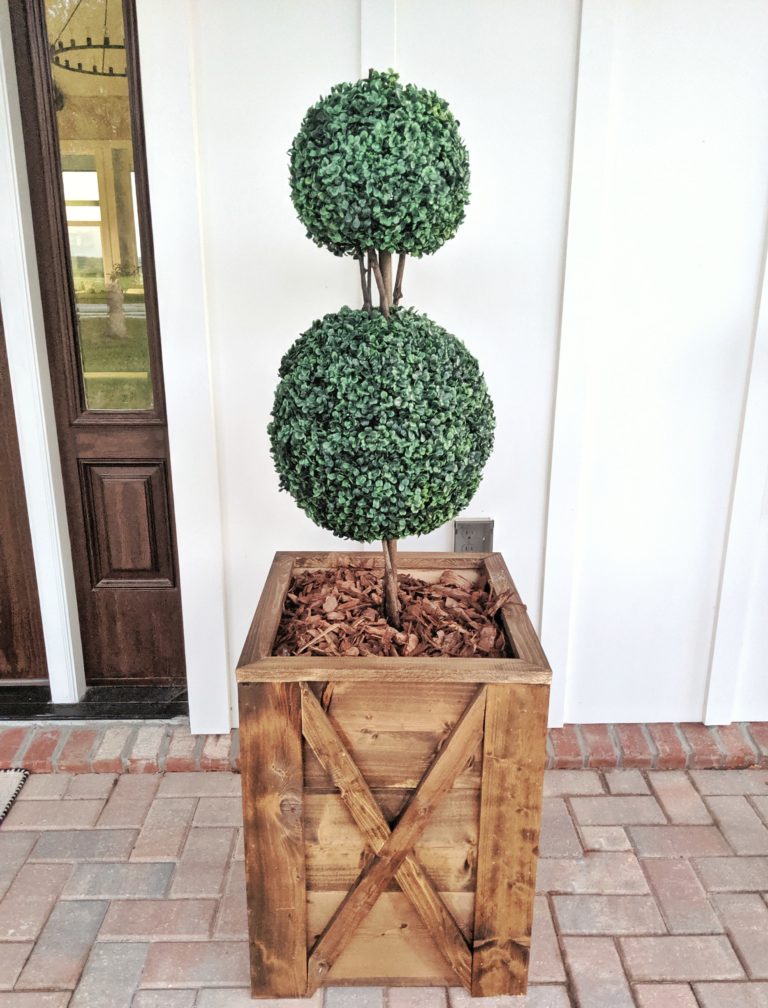
When we first moved into our new home, I was on the lookout for some wooden planters to put on our front porch. Well, the sticker shock quickly hit as I saw how expensive they are! So my hubby and I decided to make our own and I just love how they turned out! Today I’m going to share the tutorial with you so you can make your own! Note – these planters in this demo are not to size (we made a slightly smaller version to go near our garage compared to the larger ones on our front porch which are featured in the finished photo).
**Disclosure – this post contains affiliate links. These links are not any extra cost for you and I thank you so much for your support in helping to keep Remington Ranch Farmhouse up and running!
Supplies:
Wood needed (note- these are boards needed for one planter):
Nails – 18-gauge 1.25″
Measuring tape
Stain of your choice (we used this color)
Paintbrush or rag to apply stain
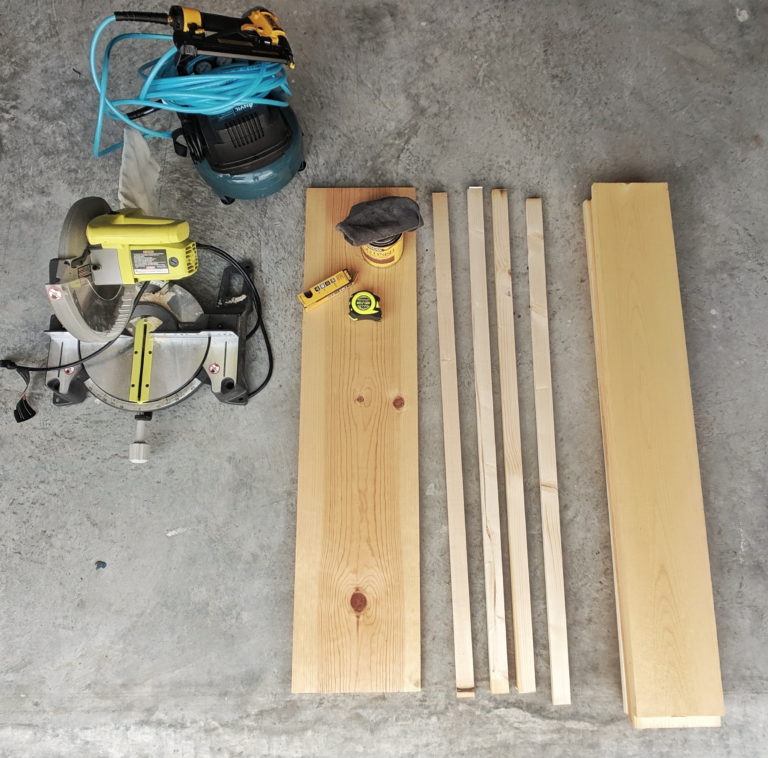
Directions:
Step 1 – Take your 1 in x 8 in x 4 ft boards and measure out 17 in. Make a straight cut and repeat for a total of 6 this length.
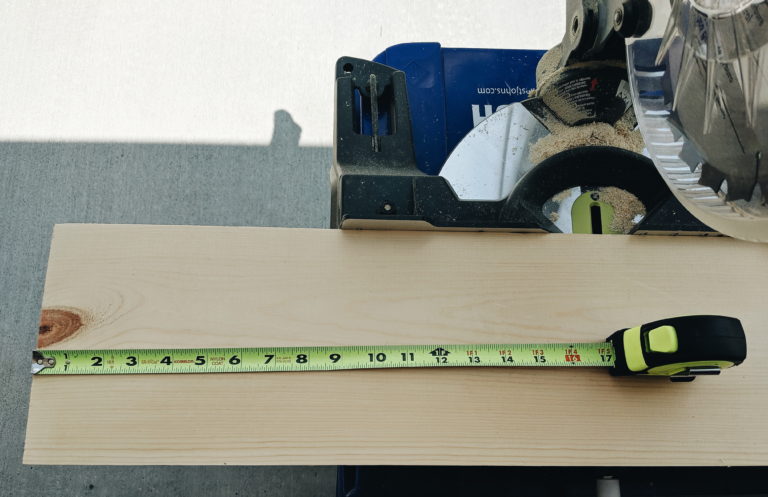
Step 2 – Now measure to 15” and repeat for a total of 6 of this length.
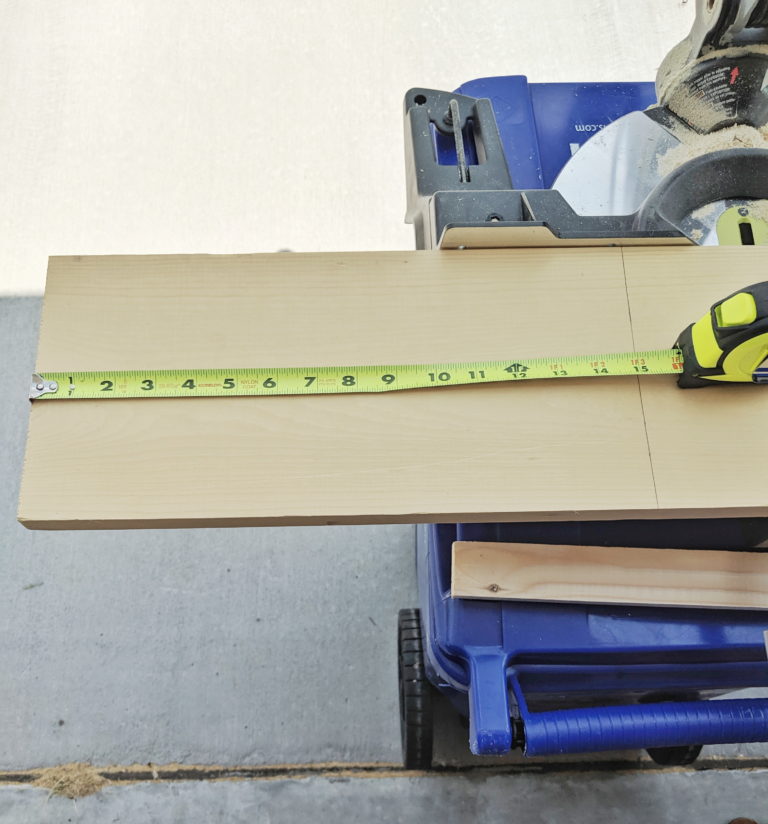
Step 3: Take a 17” board and line it up with a 15” board so that the longer 17” board is on the outside. Use the nail gun to nail together.
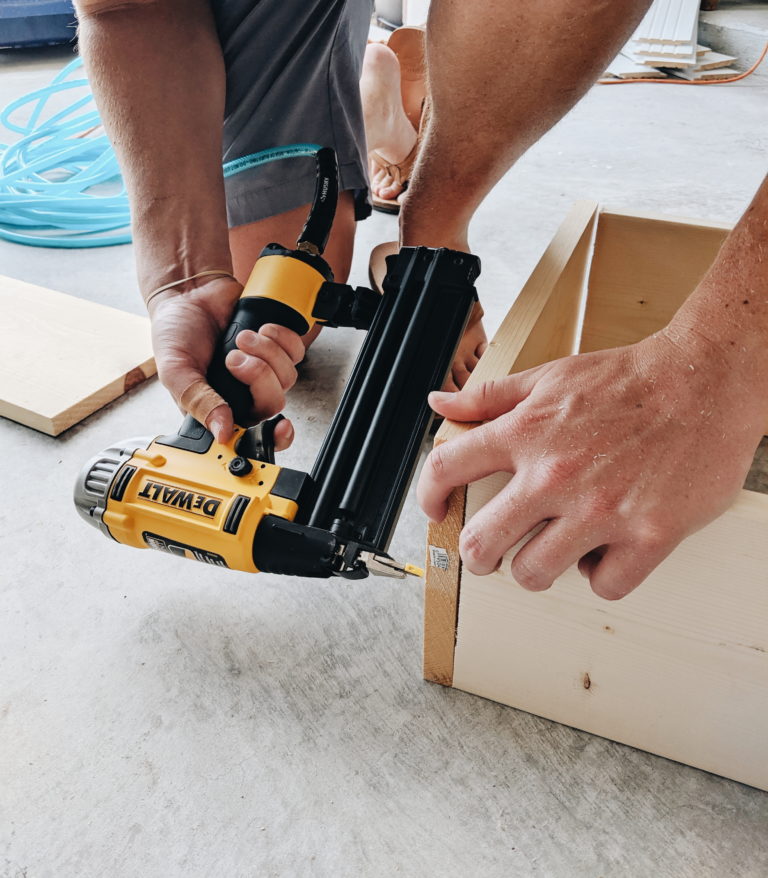
Step 4: Repeat until you have formed a square. (15” boards pictured in the front below).
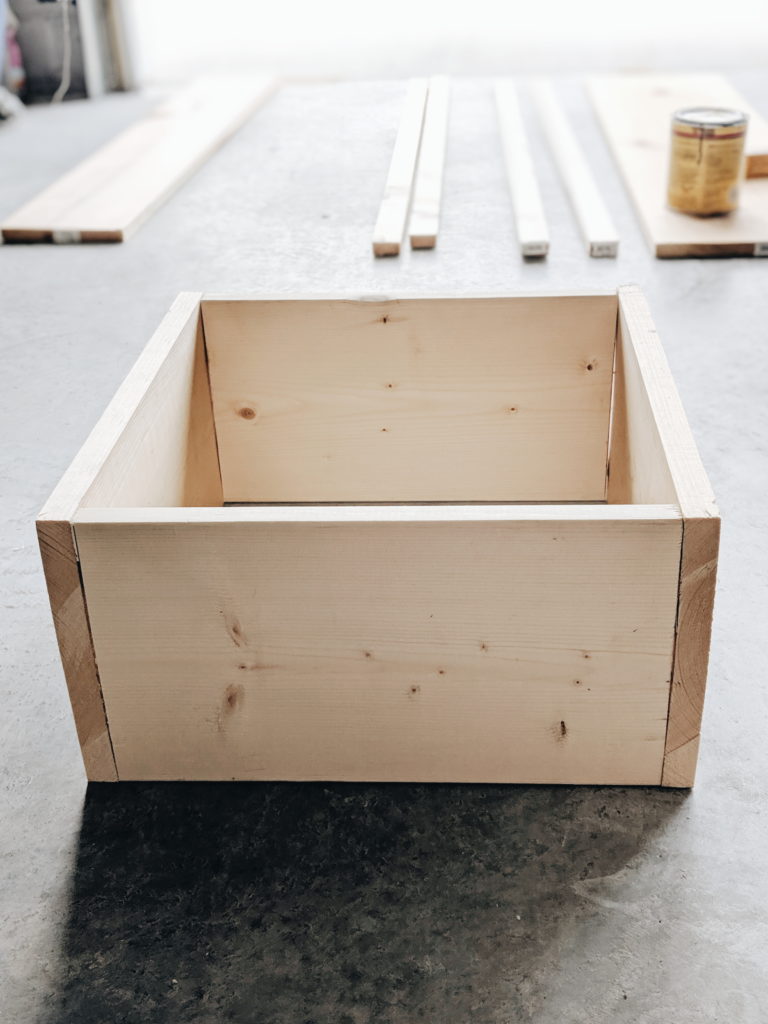
Step 5: Repeat steps 3 & 4 two more times until you have a total of 3 squares.
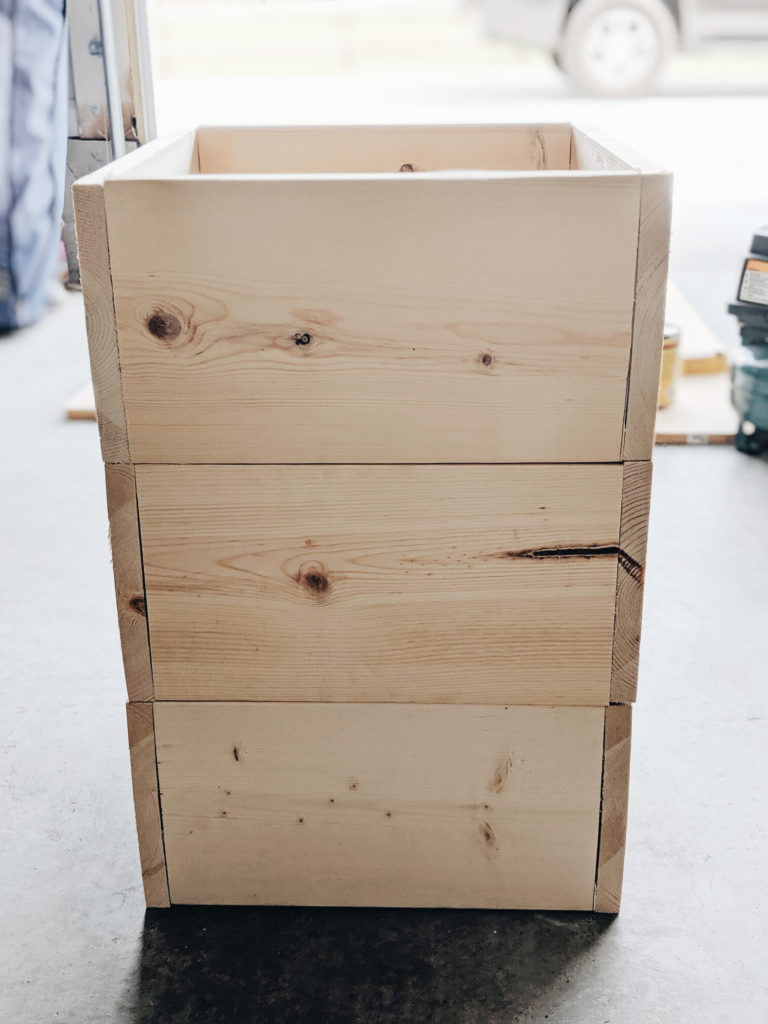
Step 6: Next, measure the height of the stacked boxes and this will be the height of your trim pieces needed – it should be around 22.”
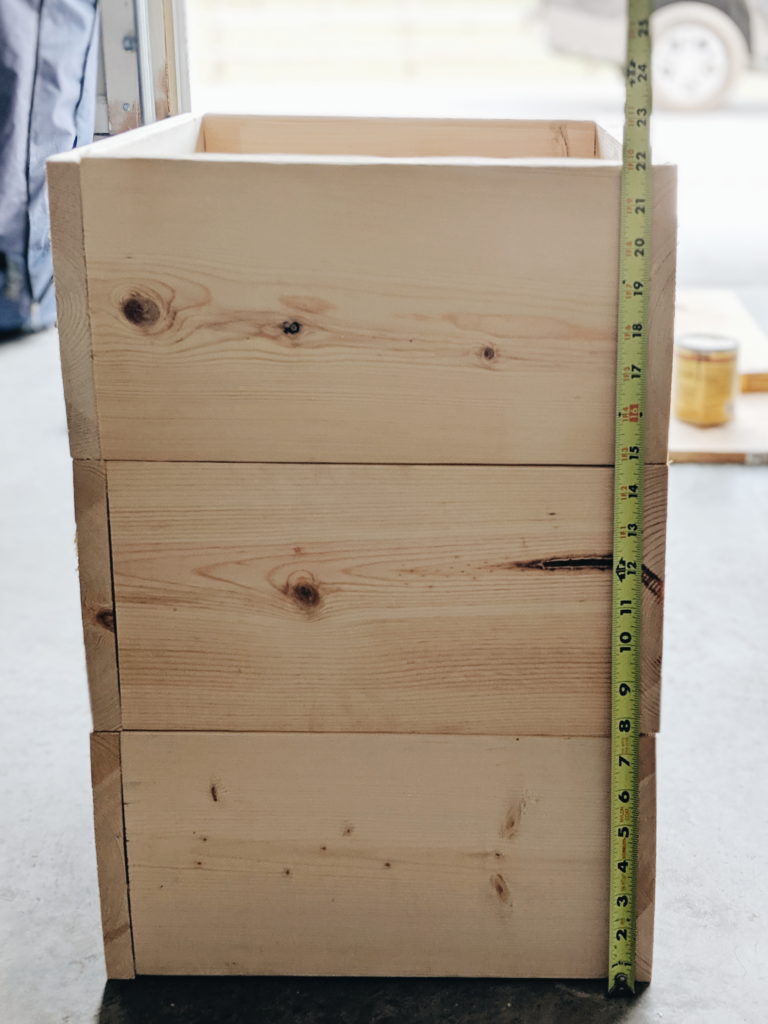
Step 7: Take your 1 x 2 boards and cut down to the length you measured. Make 4 of these cuts for the 4 corners of the front of the planter.
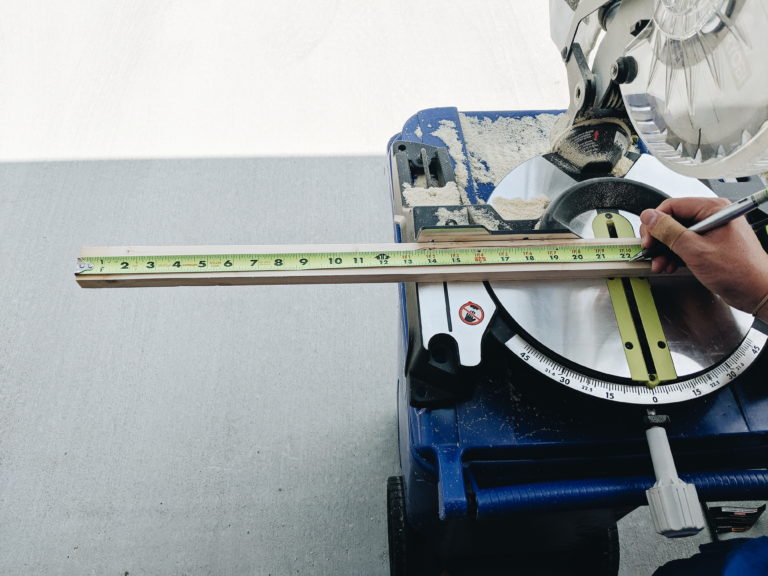
Step 8: Take one trim piece and nail it to the stacked boxes as shown below. Nail it to the side of the planter where the sides join together vs the smooth side. Repeat for all 4 corners.
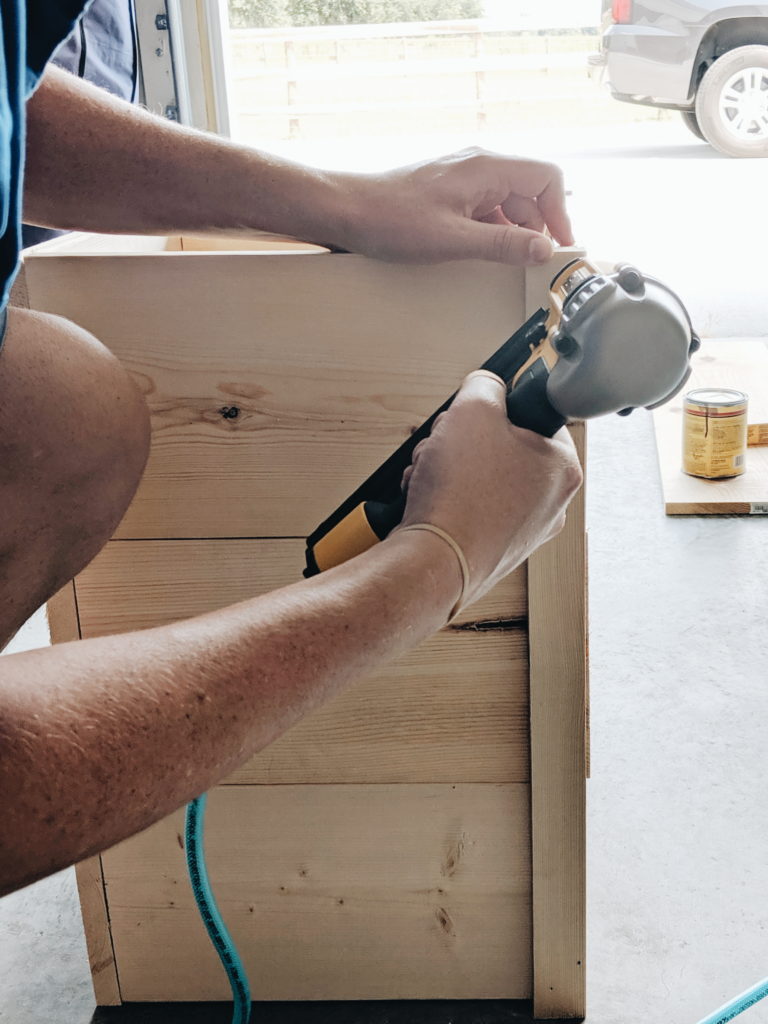
Step 9: Next, measure the interior length and width of the bottom of your planter. Cut a piece with those dimensions from your 3/4-in x 20-in x 4-ft board. Then nail it to the sides from outside of planter.
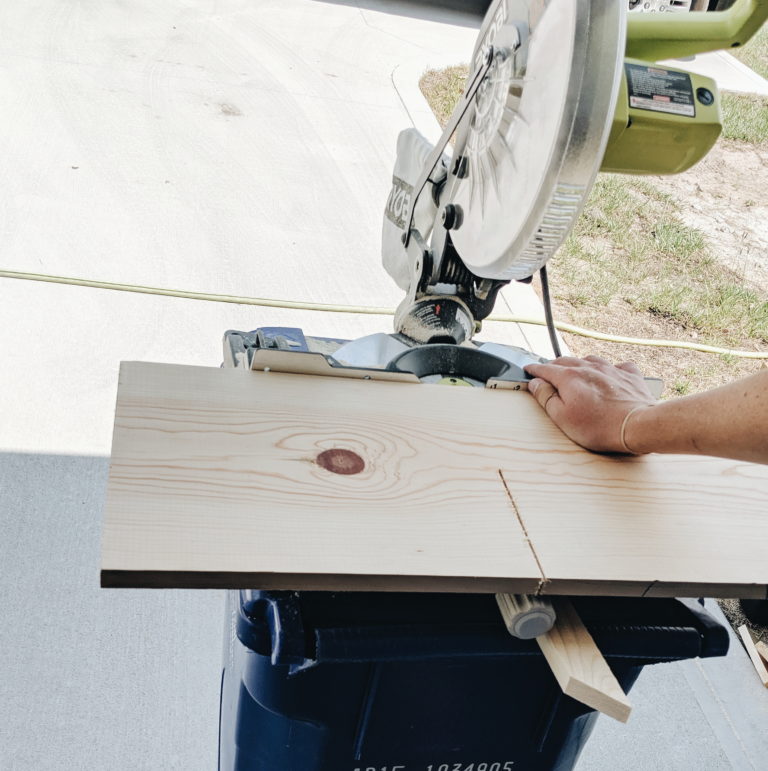
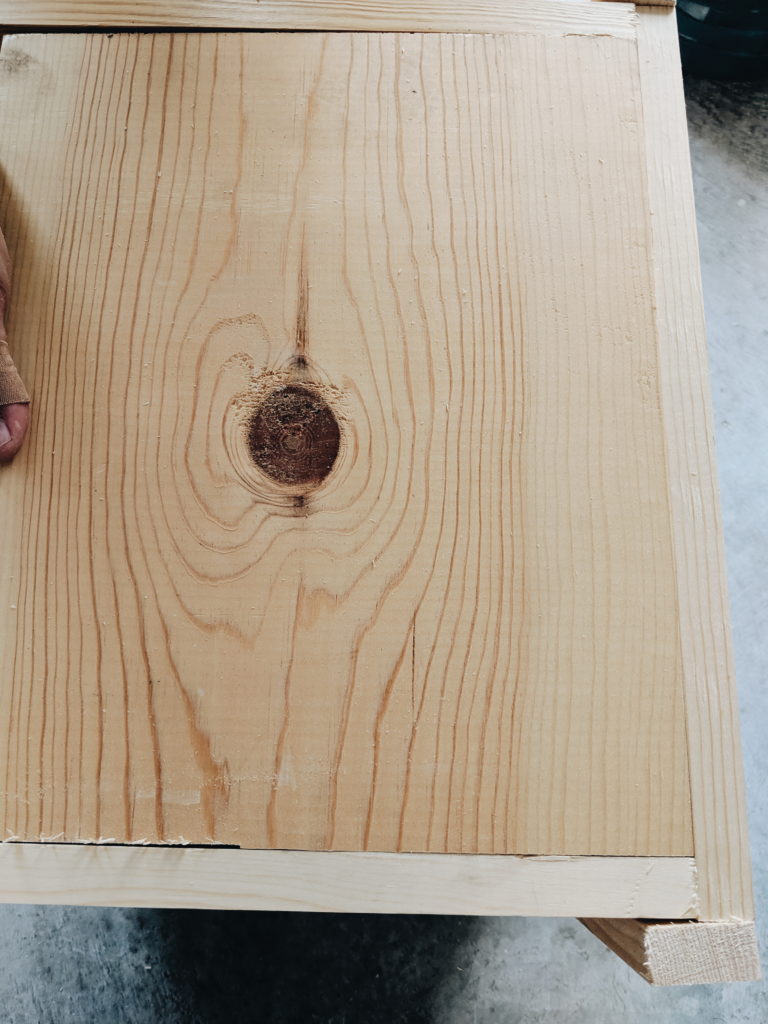
Step 10: Take a 1×2 board and place it on an angle across the front of your planter. This will be the process of starting the “X.” Make sure to line the corners up exact as shown in the picture below.
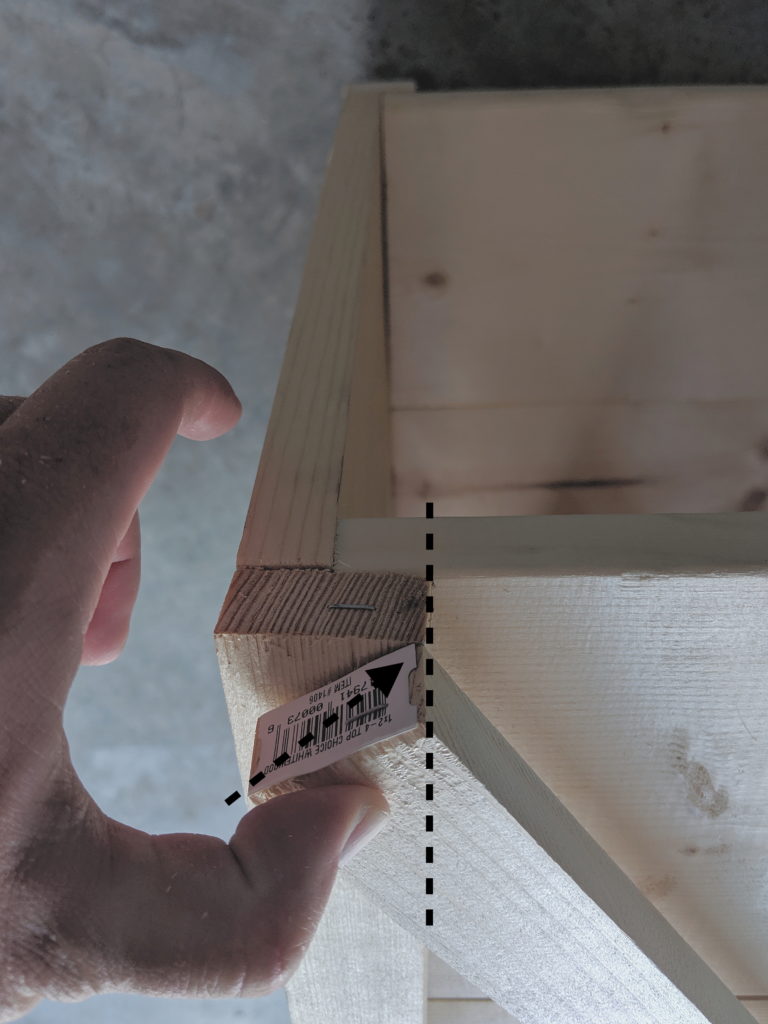
Step 11: Make a mark where the “X” piece meets the attached trim piece and continue to draw a straight line to the corner which will be your cut.
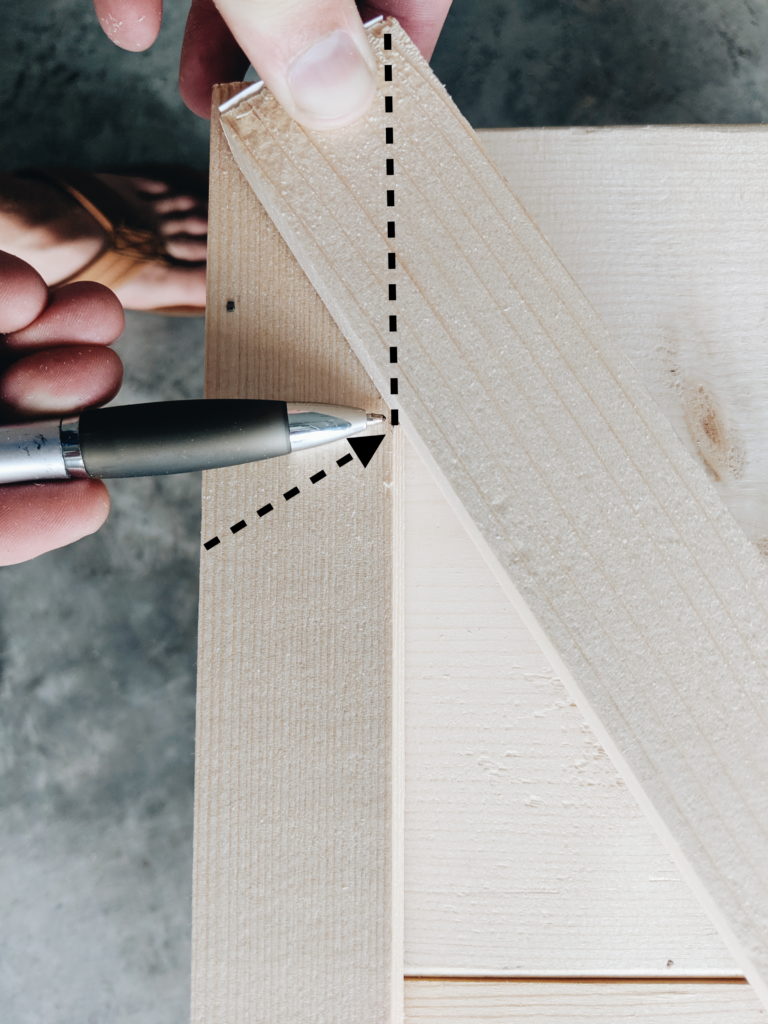
Step 12: Repeat step 11 at the bottom of the 1×2 board. It’s important you hold the board in place exactly or this will throw off the angles of the cuts.
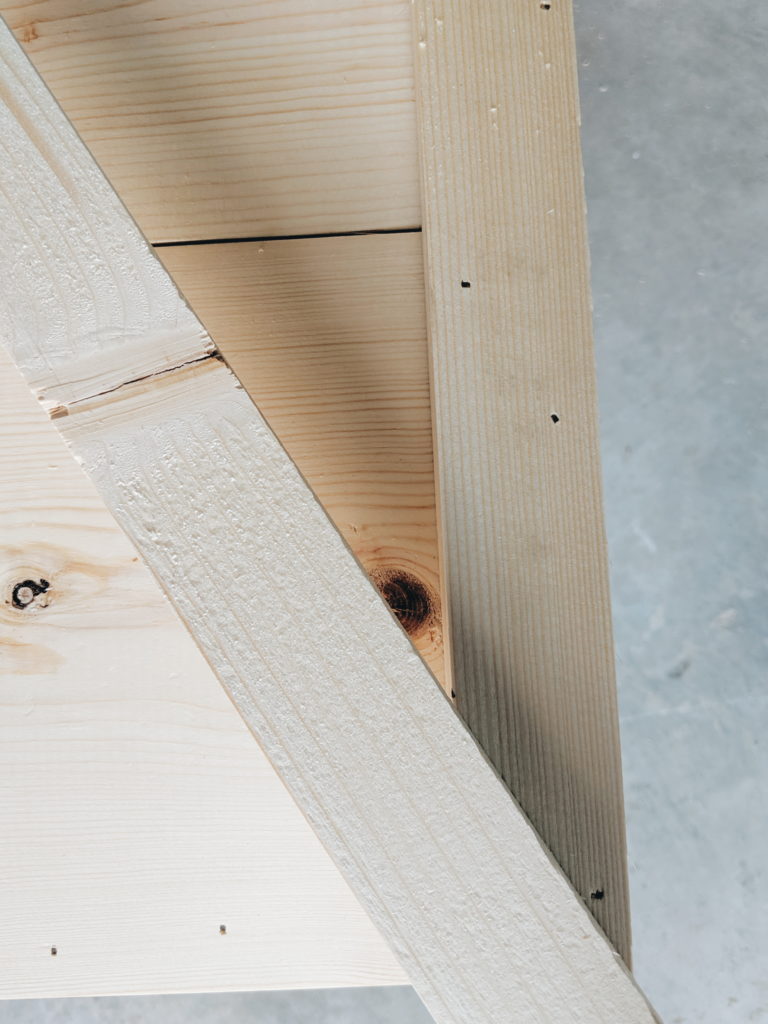
Step 13: Make the cuts that were marked out with pen using the table saw. Then nail the piece of board to the planter.
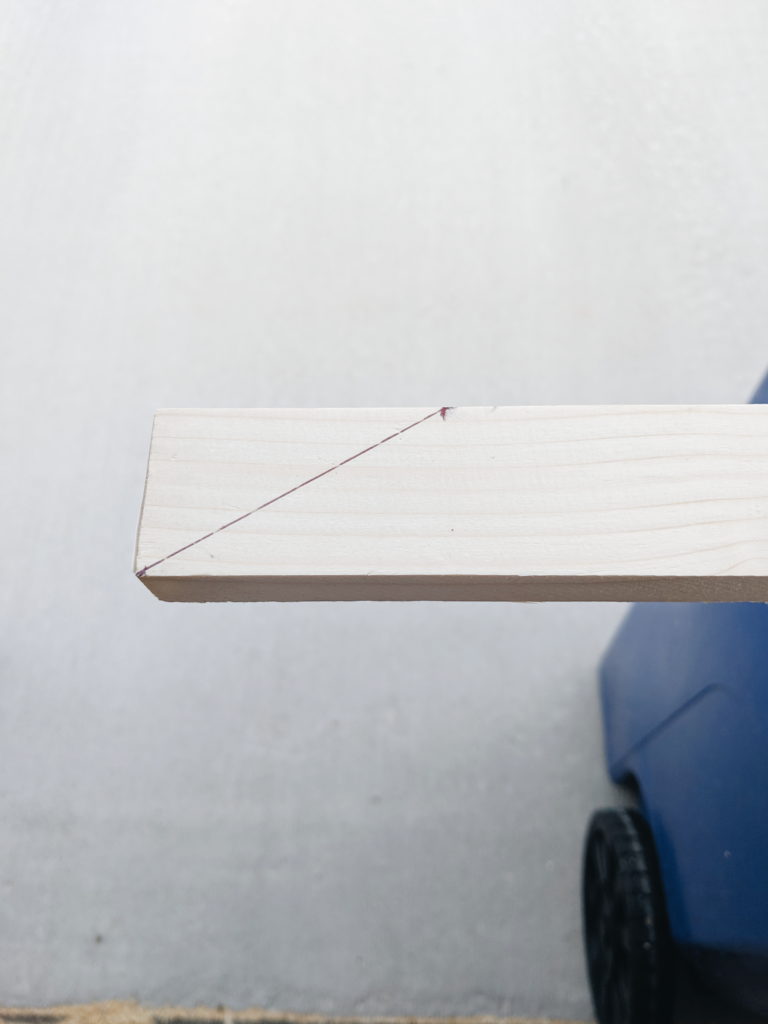
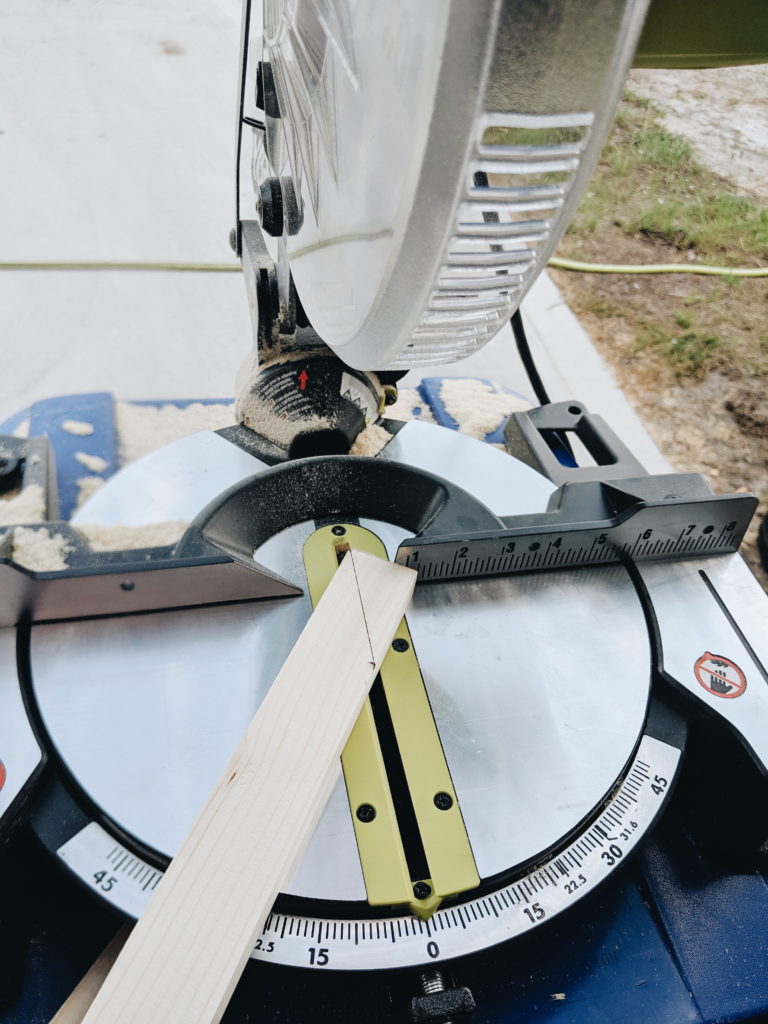
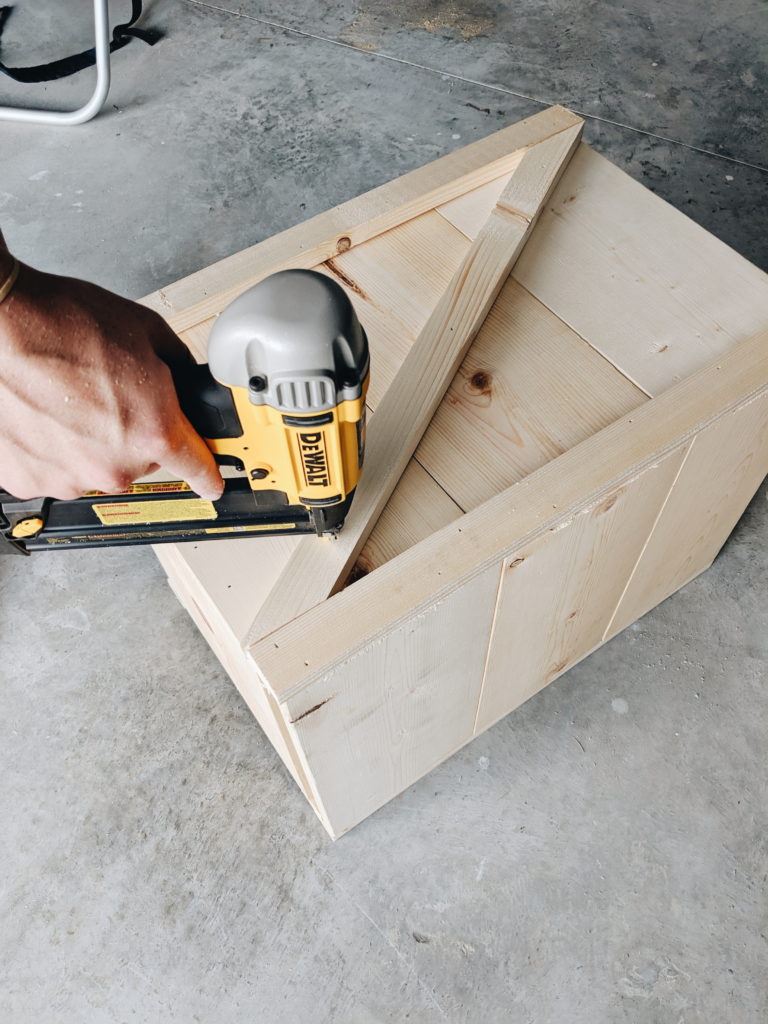
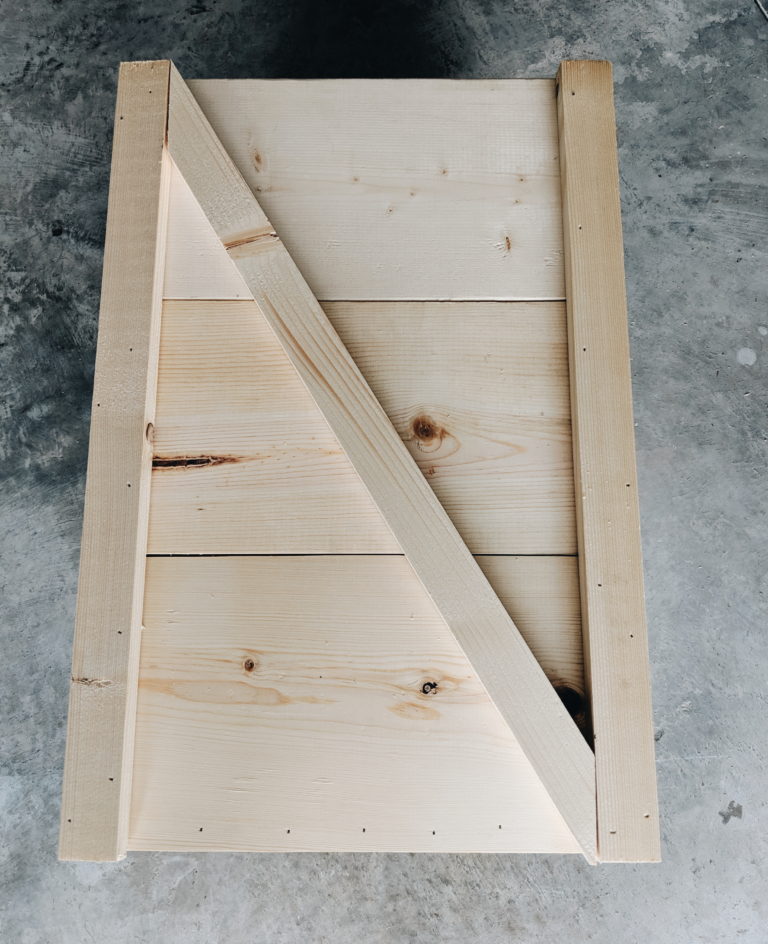
Step 14: Repeat step 11 to start second piece for the “X.” The only difference will be is that you need to cut out the middle where the pieces overlap for the center of the “X.” Draw a line where you will need to cut out the “X” center to make it into two pieces.
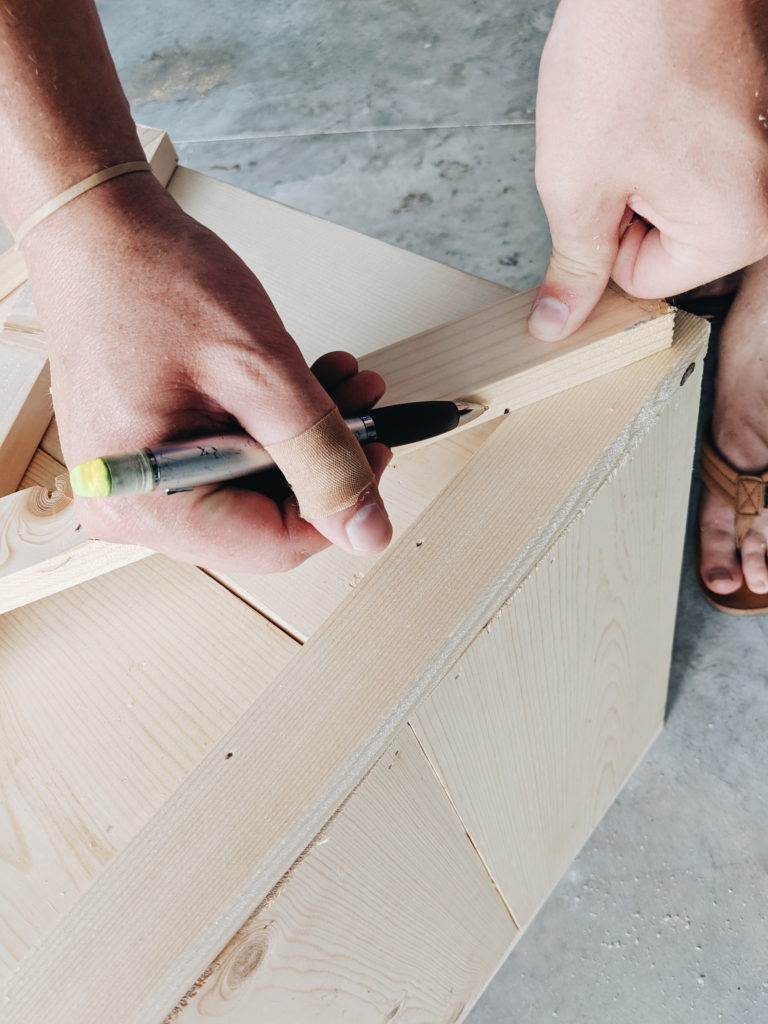
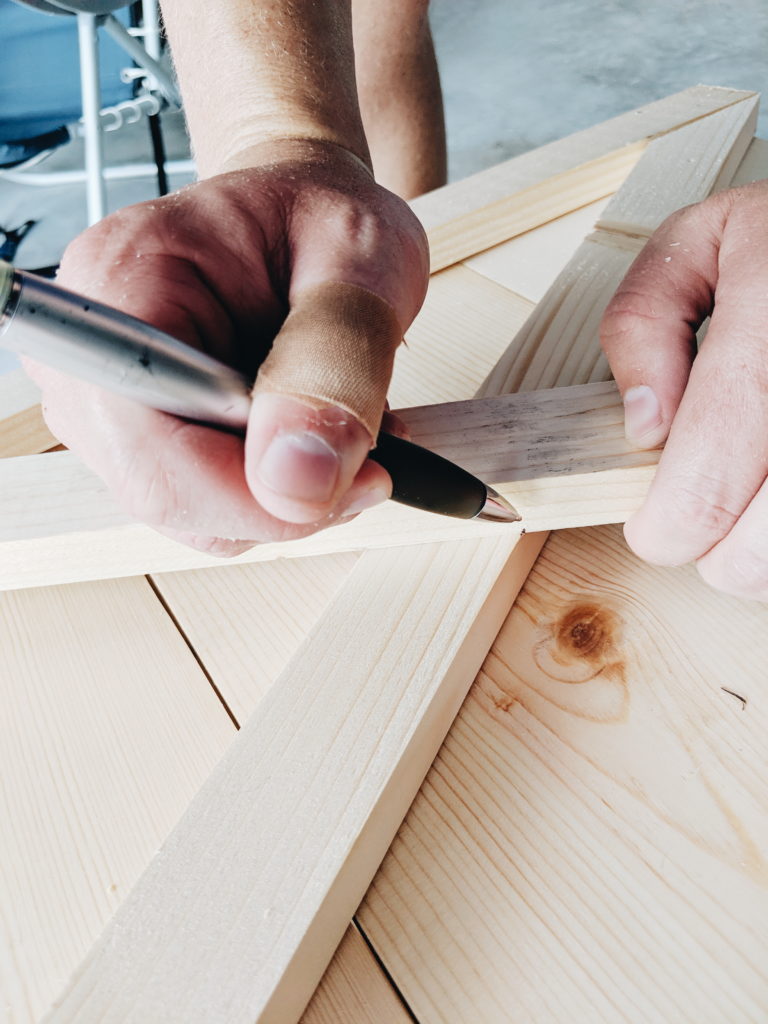
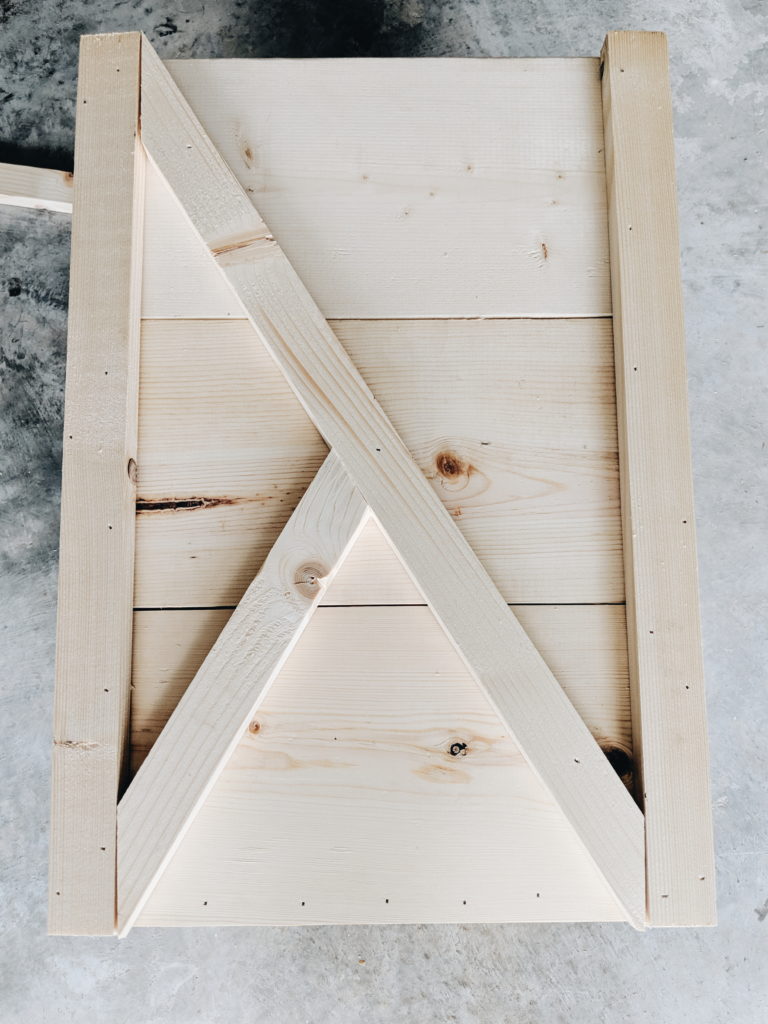
Step 15: Once your “X” piece is cut into two, you can mark out the remaining angle on the corner like in step 12 and 13.
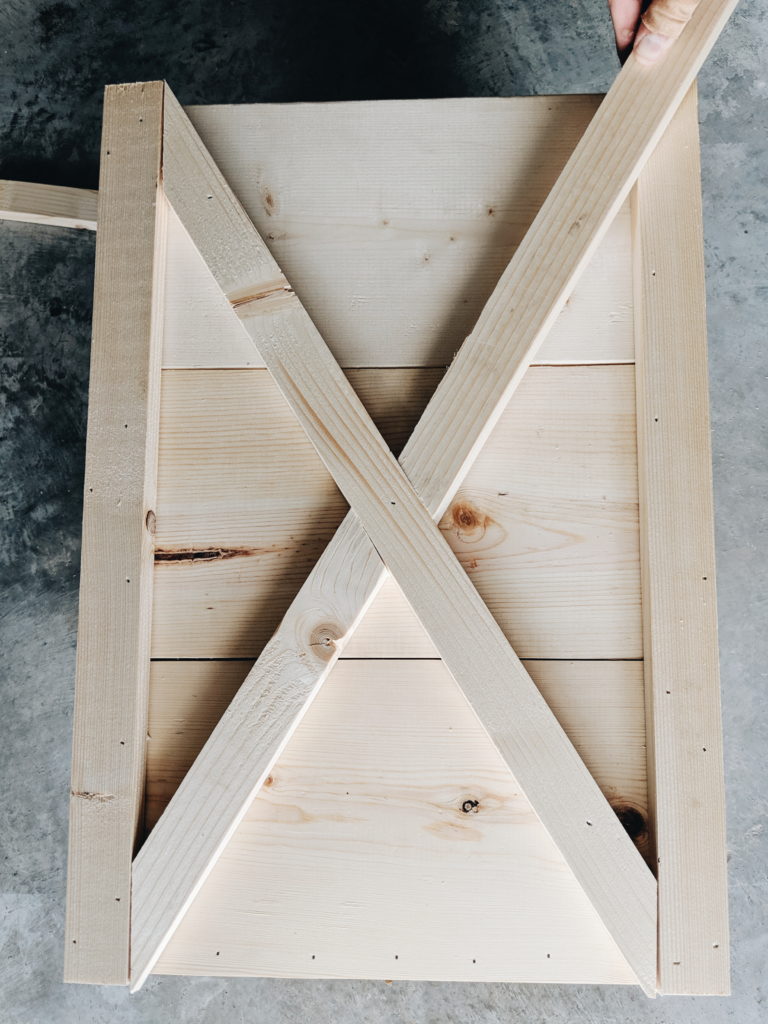
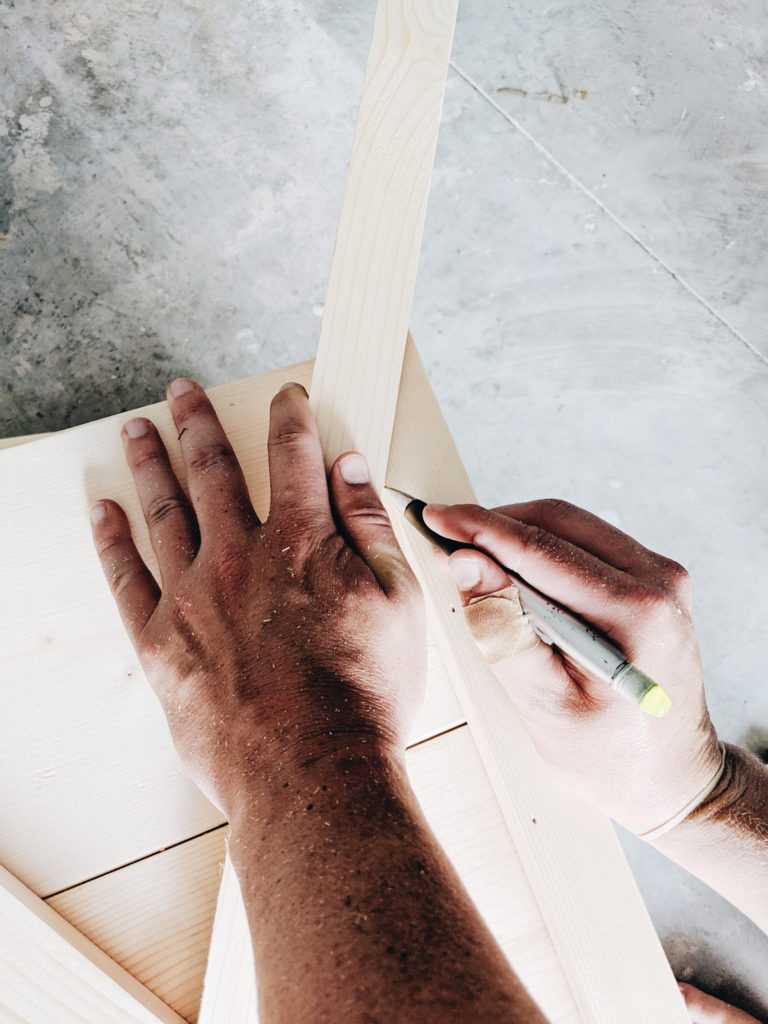
Step 16: Now measure the length of the top of the planter as shown (your dimensions should be slightly larger than ours since we made a smaller version of the planter for this demo).
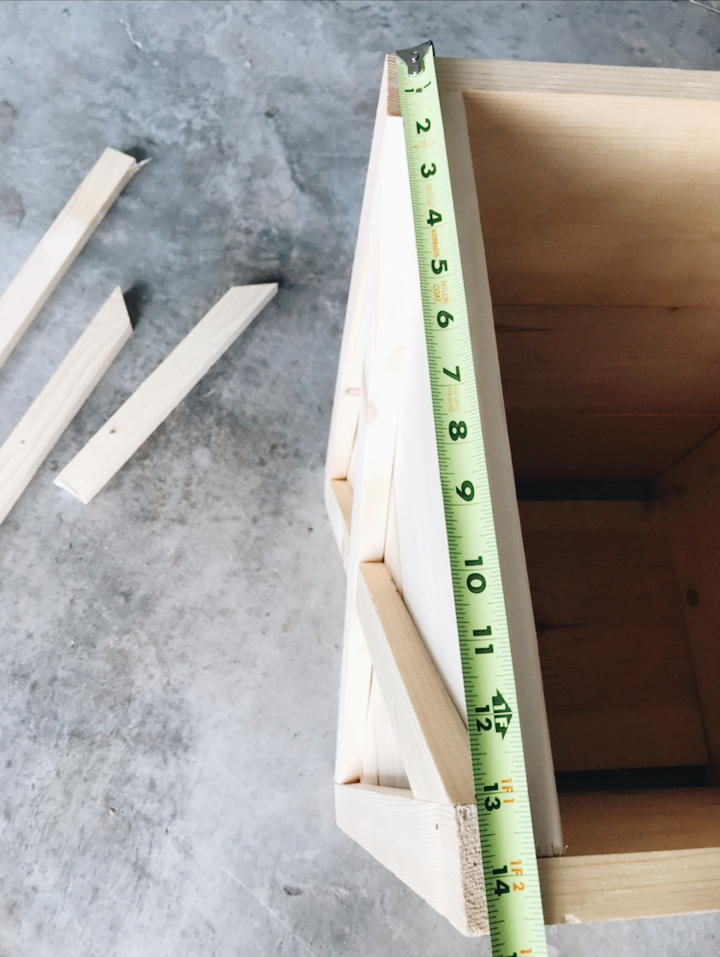
Step 17: Measure that length onto a 1×2 board and cut it at 45 degree angle using your saw. Now be very careful, on the opposite end of the board you just cut, cut another 45 degree angle but make sure the angles are running perpendicular (not parallel!) as shown below. Repeat that process four times, making sure to measure before cutting each trim piece.
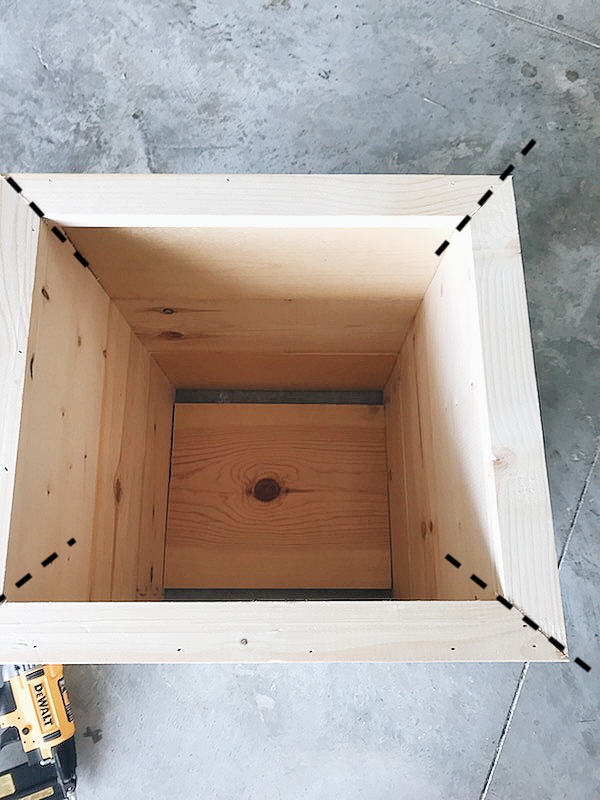
Step 18: Nail the trim pieces to the top of your planter.
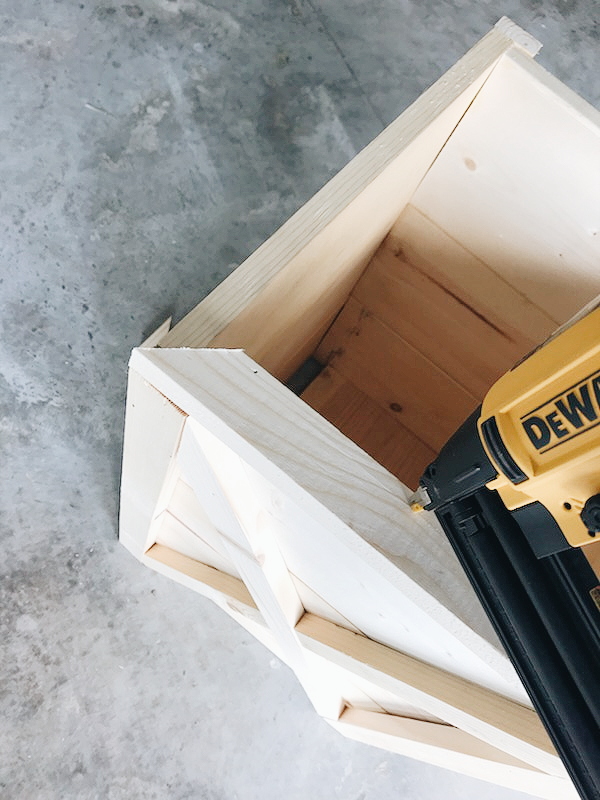
Step 19: Your planter is now fully assembled (yay!)
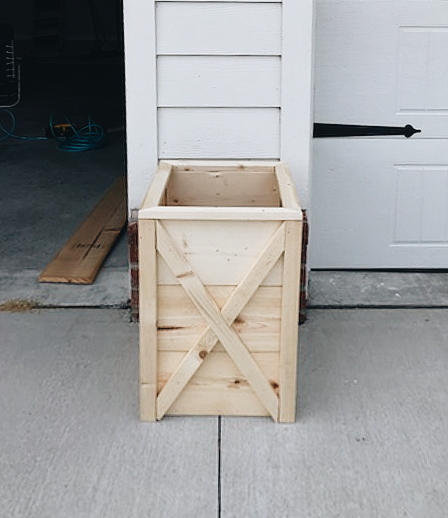
Step 20: Stain your planter to the desired color. We used this stain color which is a nice warm wood tone.
Step 21: After the stain dries, if your planter will be exposed to elements coat with poly-urethane. Enjoy your new wood planter!
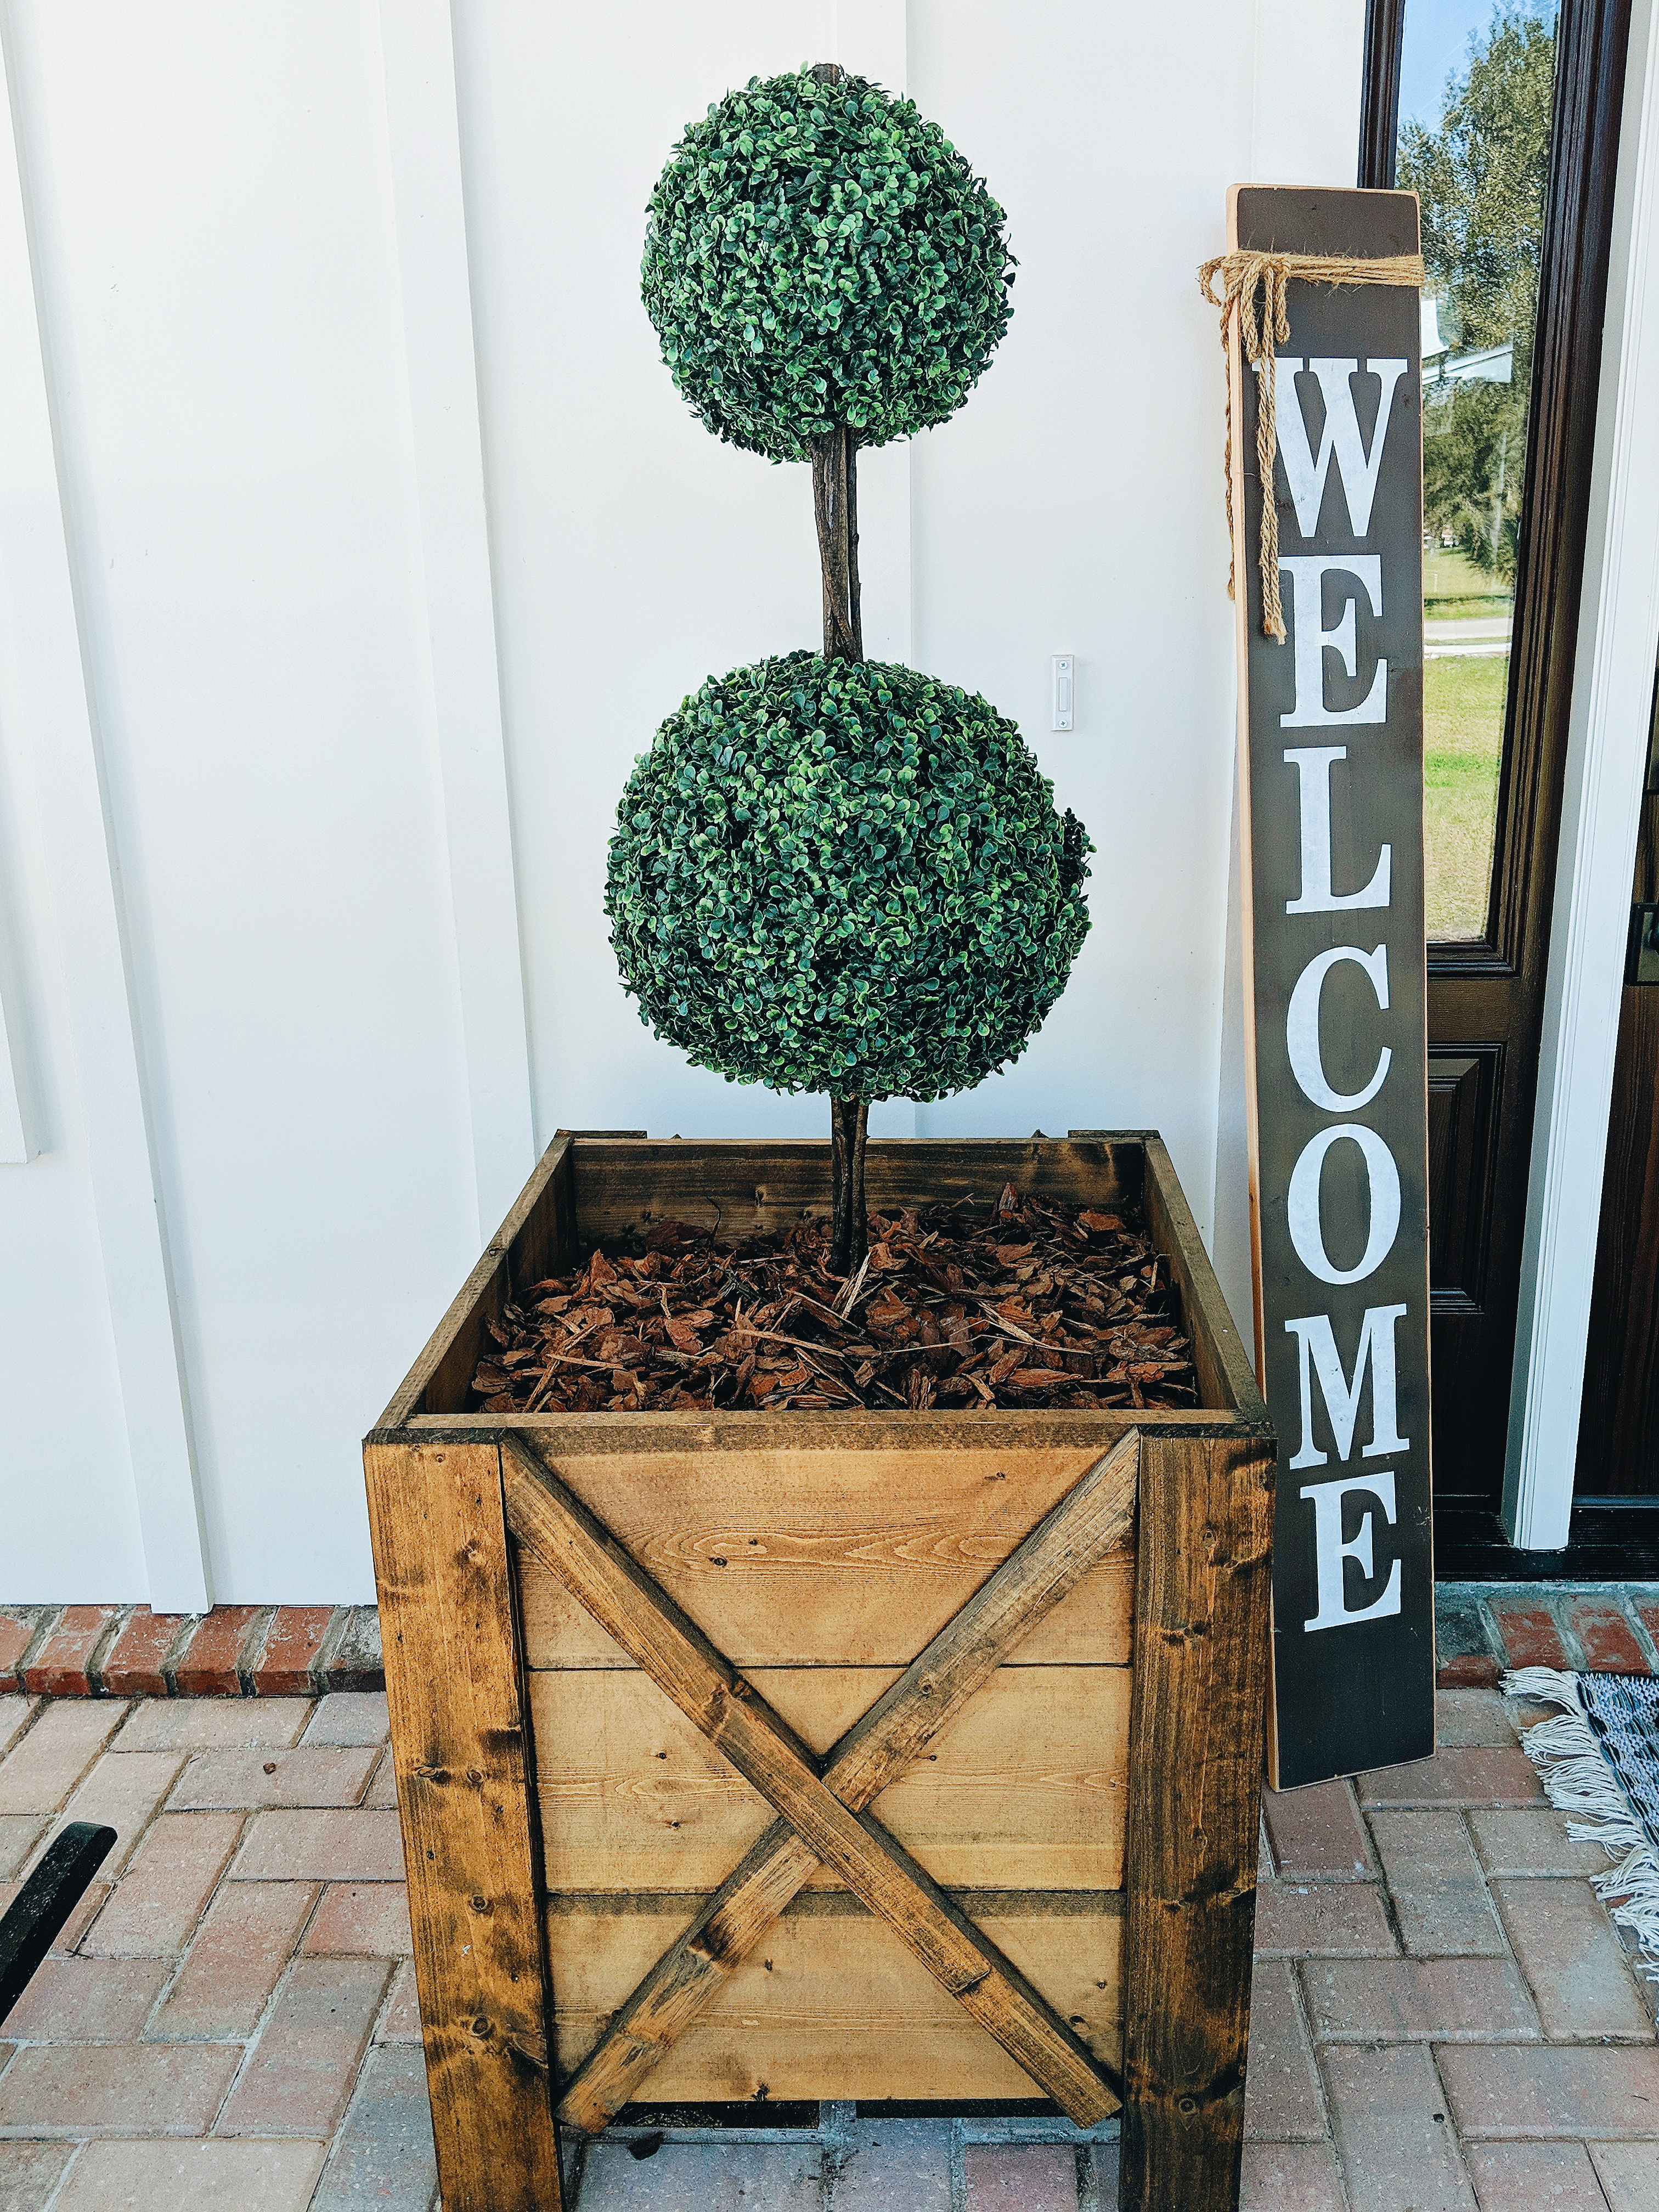
I have been on the hunt for some faux topiaries for our front porch to fill our wooden planters with. I quickly realized how pricey they are especially when you need two! I found these which I loved, but was determined to find a cheaper way to make them at home! So I decided to use…

The snow has finally melted & I’m so excited to finally start prepping for patio season! Last year we did some pretty big projects with the help of Lowe’s & I’m so ready to start enjoying these spaces again this year. Lowe’s SpringFest is currently happening now & it’s a great time to score big…
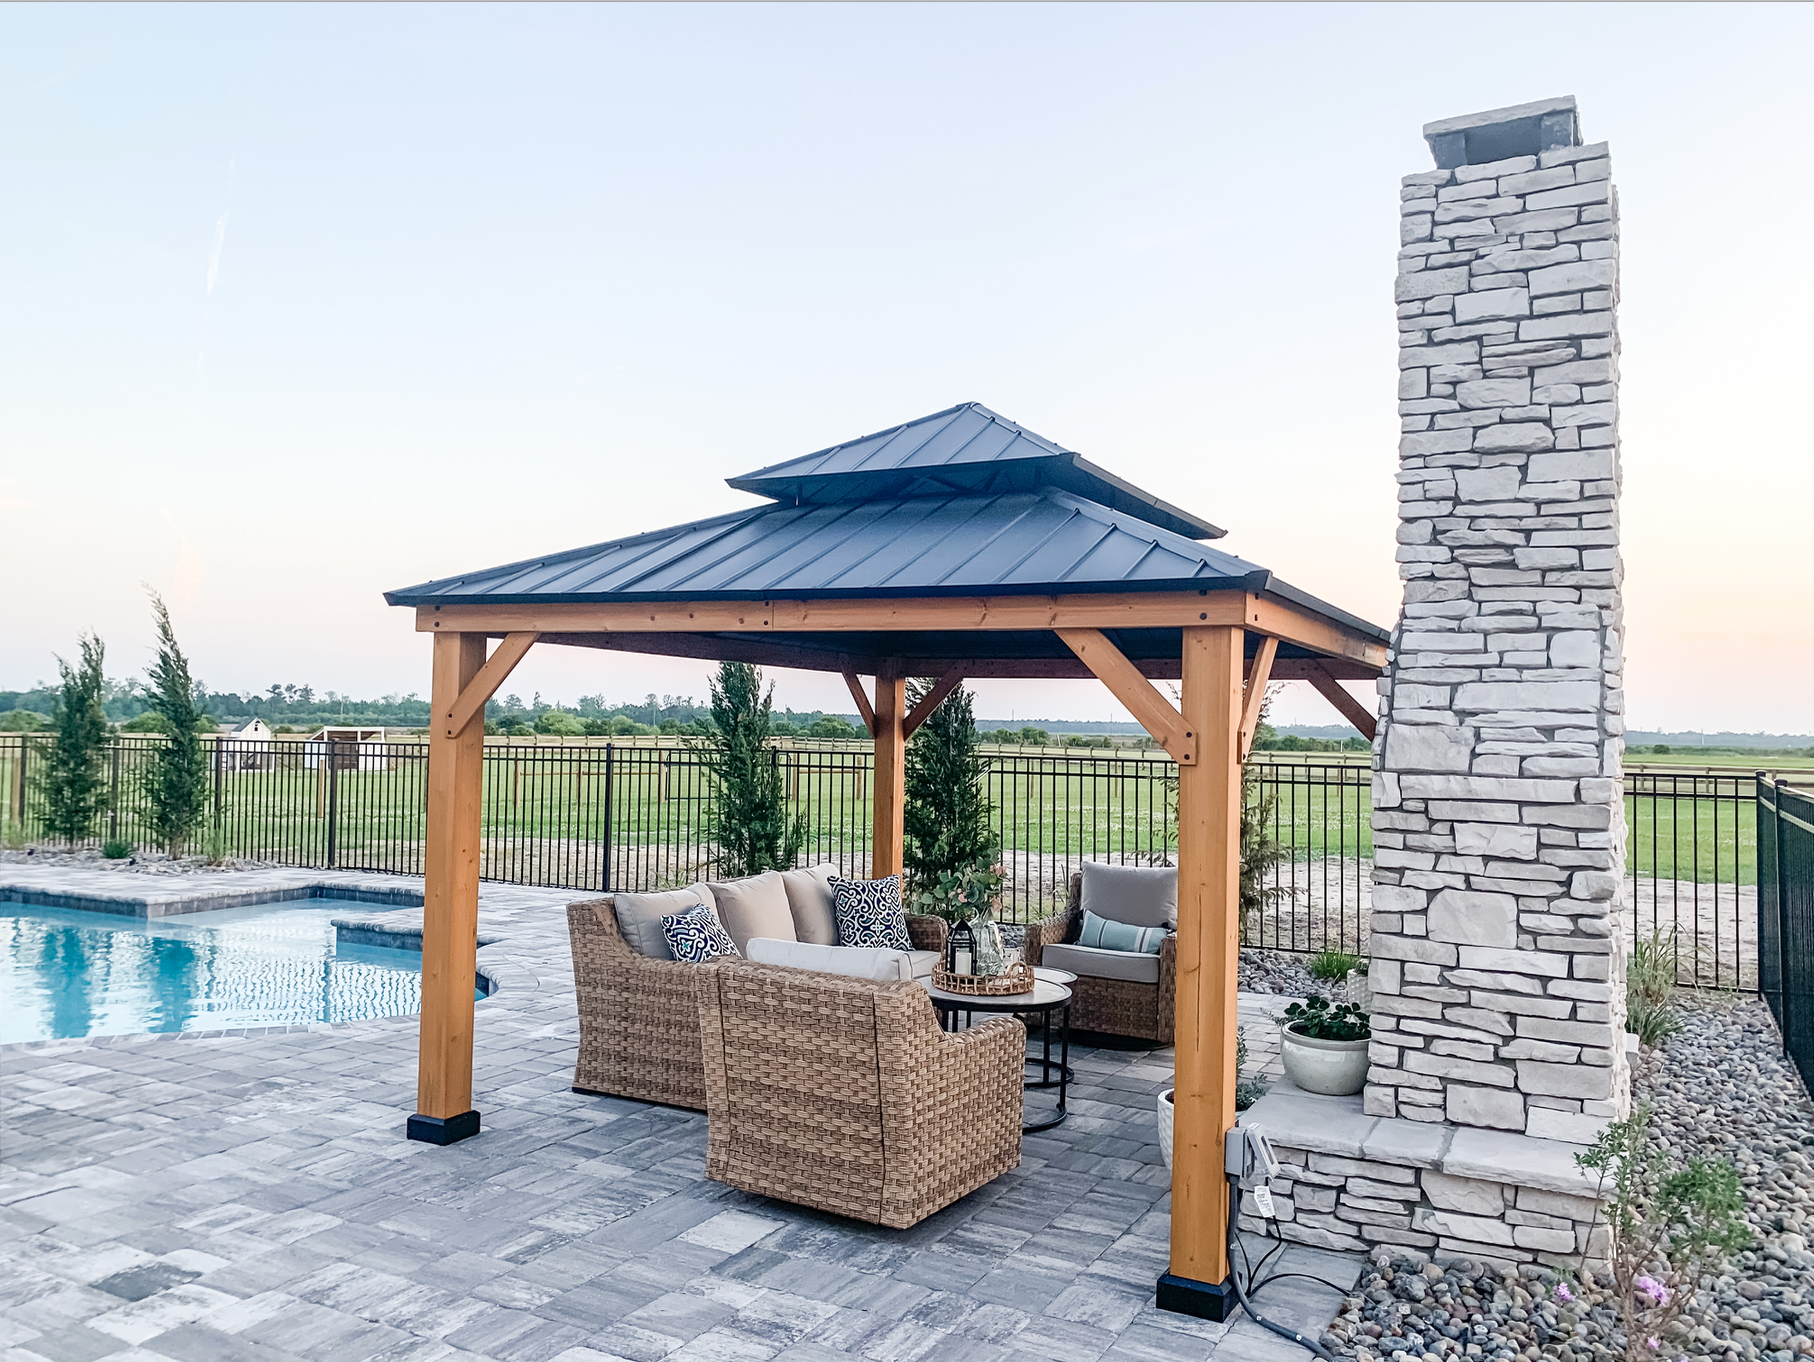
Here at the ranch, we love spending time outdoors. Our latest big project was creating a beautiful outdoor oasis thanks to Sunjoy Group. We were gifted the 12 ft x 10 ft Cedar Frame Gazebo which you can find here. My husband and I put together the whole thing ourselves over a 2 day period (took about…

Although our fireplace isn’t old, we had always wanted white mortar to make the brick pop. Unfortunately we had a miscommunication with our builder in thinking he knew to use white mortar but instead a basic gray was used. I didn’t want to paint over all our pretty brick to get that “pop” we wanted…
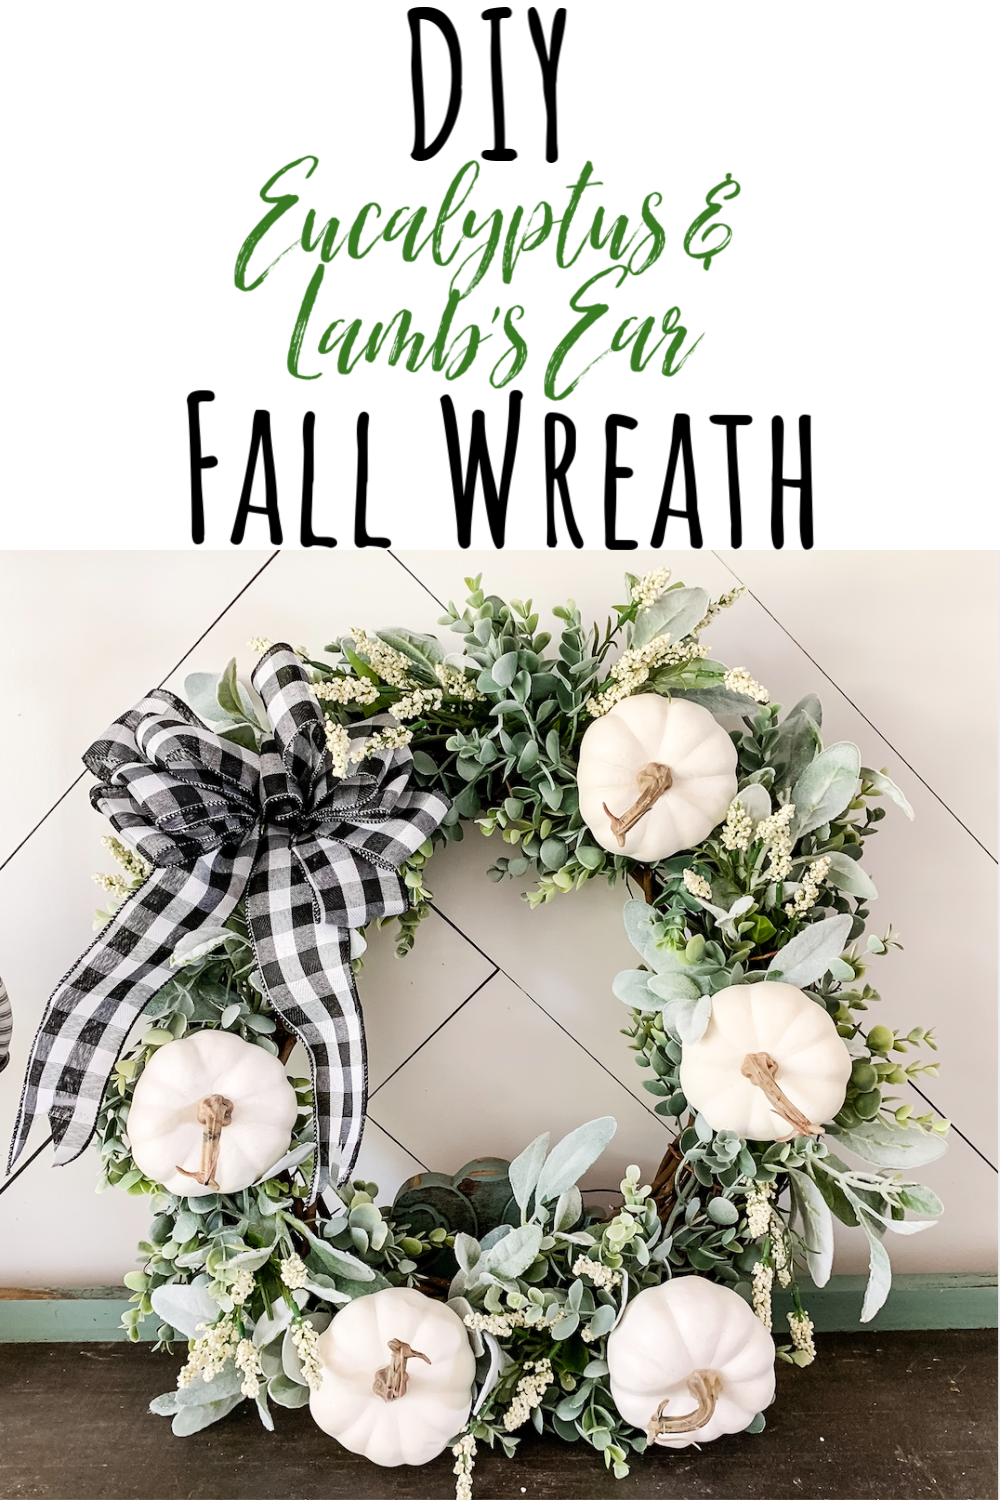
Cooler weather always gets me in the mood for some crafting! On the blog today, I’ll show you how to make this easy DIY fall wreath perfect for fall decor! *This post contains affiliate links, thanks for your support in keeping Remington Ranch up and running! Here’s what you need to make your wreath: 18…
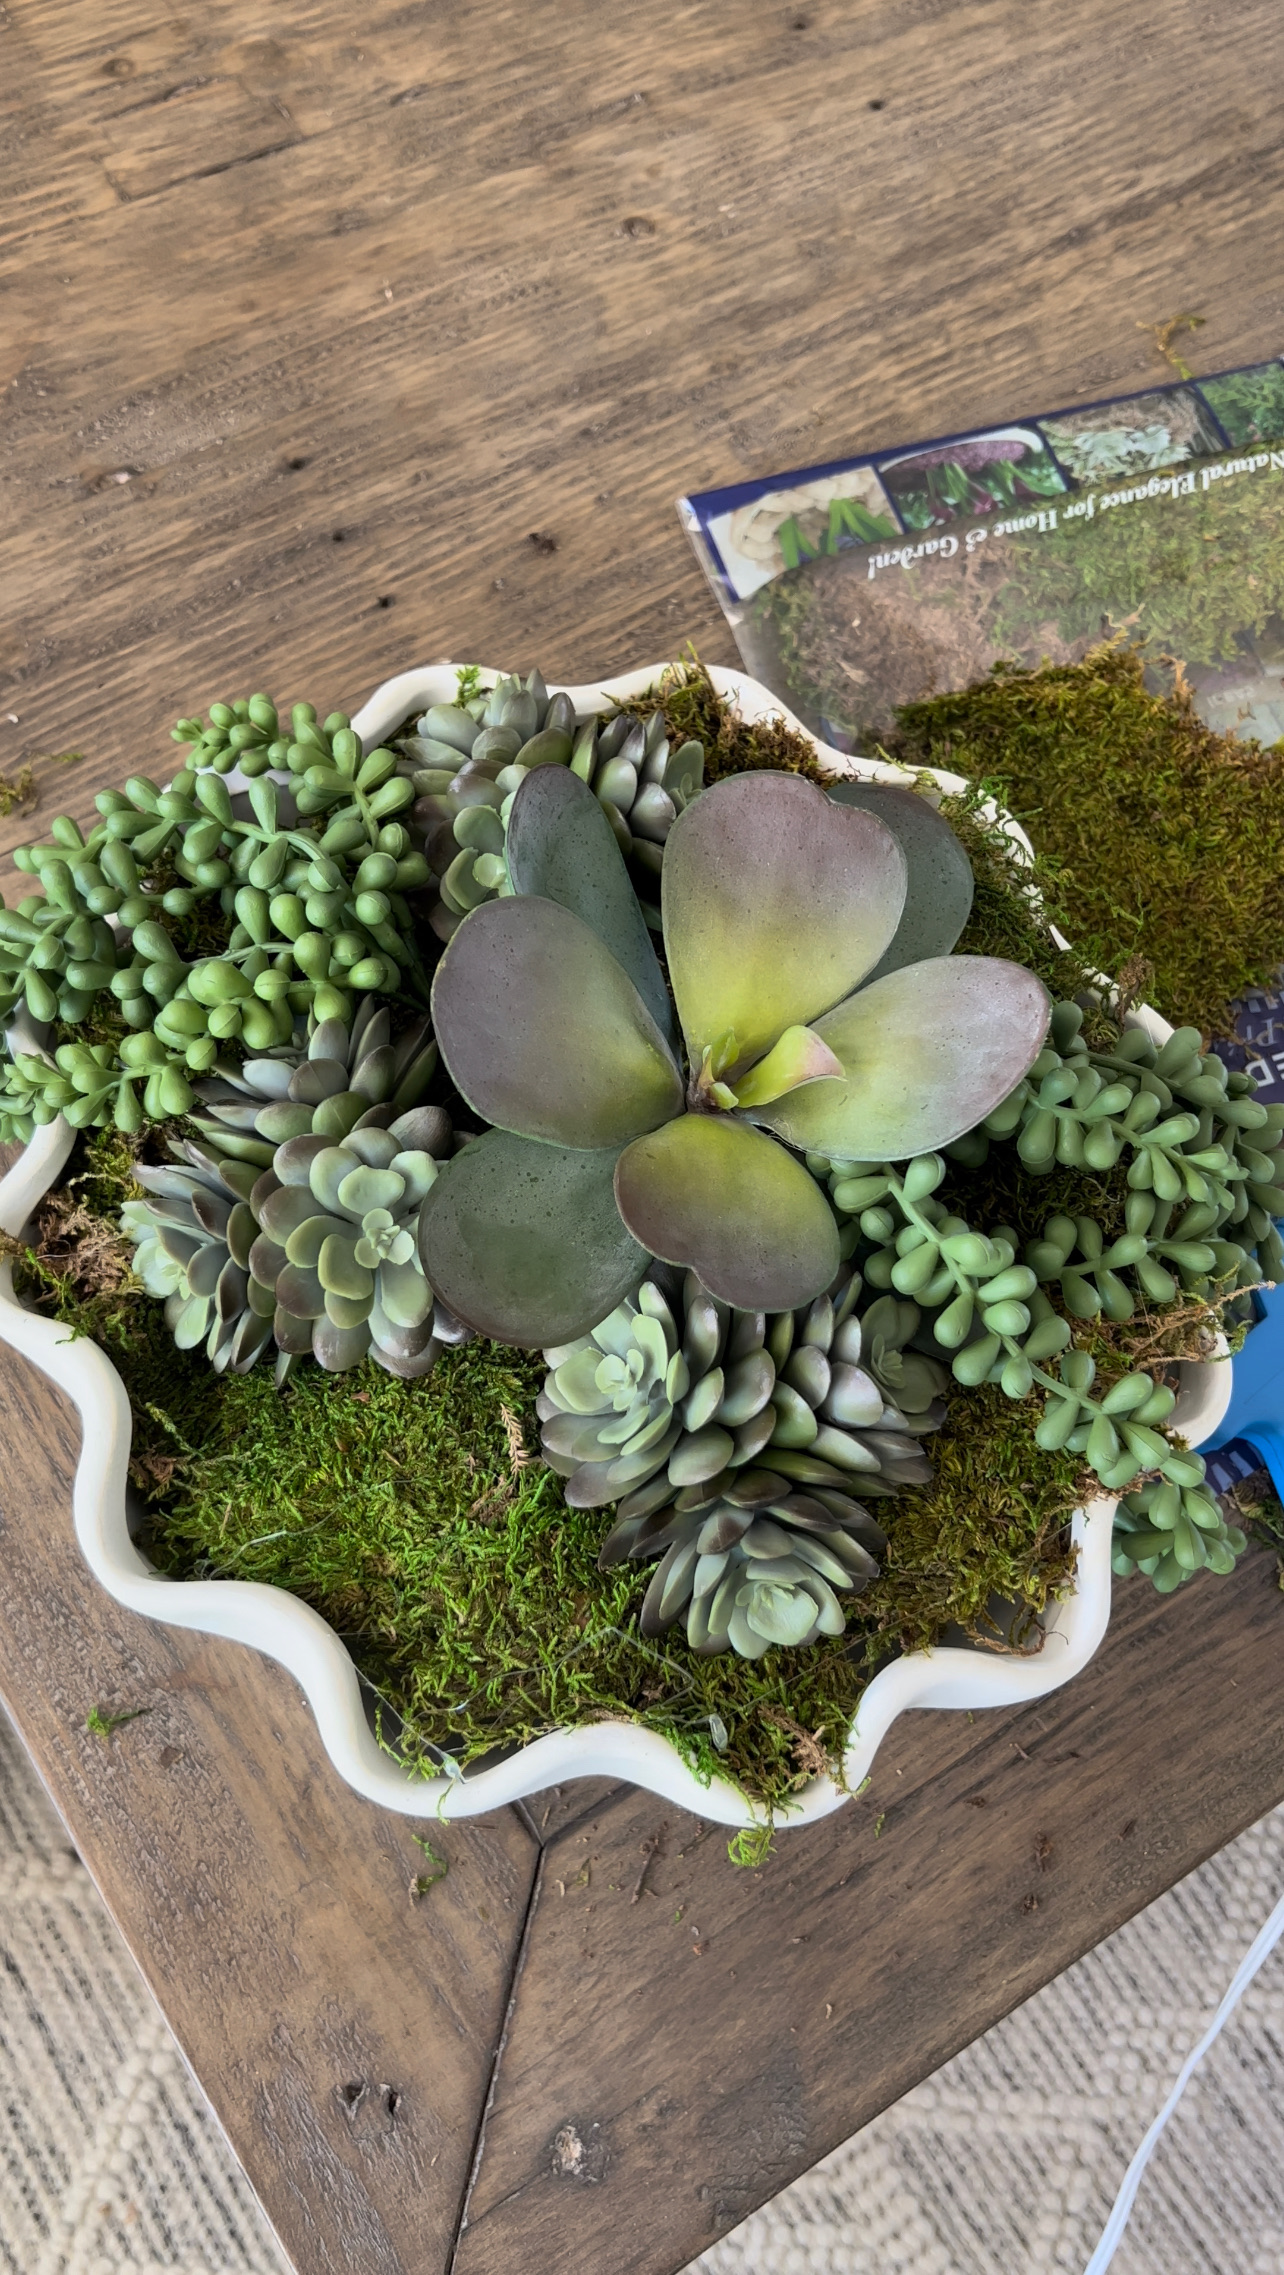
G E T T H E L O O K . . . JavaScript is currently disabled in this browser. Reactivate it to view this content. It’s been awhile since I did a DIY project and I decided I wanted to do a fun one for a centerpiece out on the patio! You could also…

I have been on the hunt for some faux topiaries for our front porch to fill our wooden planters with. I quickly realized how pricey they are especially when you need two! I found these which I loved, but was determined to find a cheaper way to make them at home! So I decided to use…

The snow has finally melted & I’m so excited to finally start prepping for patio season! Last year we did some pretty big projects with the help of Lowe’s & I’m so ready to start enjoying these spaces again this year. Lowe’s SpringFest is currently happening now & it’s a great time to score big…

Here at the ranch, we love spending time outdoors. Our latest big project was creating a beautiful outdoor oasis thanks to Sunjoy Group. We were gifted the 12 ft x 10 ft Cedar Frame Gazebo which you can find here. My husband and I put together the whole thing ourselves over a 2 day period (took about…

Although our fireplace isn’t old, we had always wanted white mortar to make the brick pop. Unfortunately we had a miscommunication with our builder in thinking he knew to use white mortar but instead a basic gray was used. I didn’t want to paint over all our pretty brick to get that “pop” we wanted…

Cooler weather always gets me in the mood for some crafting! On the blog today, I’ll show you how to make this easy DIY fall wreath perfect for fall decor! *This post contains affiliate links, thanks for your support in keeping Remington Ranch up and running! Here’s what you need to make your wreath: 18…

G E T T H E L O O K . . . JavaScript is currently disabled in this browser. Reactivate it to view this content. It’s been awhile since I did a DIY project and I decided I wanted to do a fun one for a centerpiece out on the patio! You could also…

I have been on the hunt for some faux topiaries for our front porch to fill our wooden planters with. I quickly realized how pricey they are especially when you need two! I found these which I loved, but was determined to find a cheaper way to make them at home! So I decided to use…

The snow has finally melted & I’m so excited to finally start prepping for patio season! Last year we did some pretty big projects with the help of Lowe’s & I’m so ready to start enjoying these spaces again this year. Lowe’s SpringFest is currently happening now & it’s a great time to score big…

Here at the ranch, we love spending time outdoors. Our latest big project was creating a beautiful outdoor oasis thanks to Sunjoy Group. We were gifted the 12 ft x 10 ft Cedar Frame Gazebo which you can find here. My husband and I put together the whole thing ourselves over a 2 day period (took about…

Although our fireplace isn’t old, we had always wanted white mortar to make the brick pop. Unfortunately we had a miscommunication with our builder in thinking he knew to use white mortar but instead a basic gray was used. I didn’t want to paint over all our pretty brick to get that “pop” we wanted…

Cooler weather always gets me in the mood for some crafting! On the blog today, I’ll show you how to make this easy DIY fall wreath perfect for fall decor! *This post contains affiliate links, thanks for your support in keeping Remington Ranch up and running! Here’s what you need to make your wreath: 18…

G E T T H E L O O K . . . JavaScript is currently disabled in this browser. Reactivate it to view this content. It’s been awhile since I did a DIY project and I decided I wanted to do a fun one for a centerpiece out on the patio! You could also…